Showing posts with label fantasy warriors. Show all posts

Monday, May 20, 2019

Goblin War Giant

The Grenadier Goblin War Giant weighs about 3.5 pounds (nearly 1.6 kg).

I mention this because there seems to be a direct correlation between the figure's weight and the time it took to paint it. Or maybe that was just me.

I can say that handling over three pounds of nearly-solid lead makes painting more than a little awkward at times. This definitely isn't the sort of thing you can just pop onto a holder and thoughtfully rotate a couple inches from your nose as you daub on paint!

Nevertheless, after about six weeks of on-and-off painting in the evenings, I finally got this sucker done.


All my Fantasy Warriors figures are getting my "old school" basing treatment: green paint, topped with simple flocking.


I decided while painting this guy that my gobbos' skin tones will match those given in the old AD&D Monster Manual for that extra throwback flavor. 


I'm immensely proud of how this turned out. Not only does it look great (if I do say so myself), but it's a real blast from my gaming past—oh how I drooled over the full-page ads for this bad boy in my old Dragon magazine ads back in the day! And now it's mine...all mine!! Muhahahaha!

Next up: switching gears to work on some ancients for DBA...but in a vernacular I've never painted before. Stay tuned!

Thursday, February 14, 2019

A Return to Fantasy Warriors (and Some Musings on Miniatures Pricing)

In my last post I teased a bit about acquiring the legendary Nick Lund "Goblin War Giant" sculpt. Although recasts are available through Mirliton, I managed to find an original on eBay for only slightly more than the cost of the recast, so now I have the old box too! I have fond memories of drooling over the ads for this guy in Dragon magazine back in the day, and it's kind of wild to finally have it in my collection.

And yes, fond memories are at the root of this particular project.

Now, my love for Fantasy Warriors was what got this blog started waaaaay back in the day, but unlike then I am now a man in his 40s, and I am biologically compelled to get all weepy and nostalgic for lost glory days of old and such.


In all seriousness though, the classic look of Grenadier and Ral Partha instantly transports me to a time when tabletop gaming was brand new and terrifically exciting to me, and it's both useful and rewarding to be able to access those memories 30 years hence. Although I enjoy gaming on different levels—dare I say better levels—than I did then, I do miss that sense of unbridled curiosity and fascination that came with delving into a rich and rewarding hobby, and collecting old miniatures brings back a touch of that numinous experience.

Plus the figures are just damn cool.


So after much deliberation, I've decided to part ways with my Warmachine/Hordes collection as well as my Armies of Arcana collection. This frees up four shelves in my cabinets and gives me the capital to fund the putting together of four Fantasy Warriors armies (Humans, Amazons, Goblins, and Undead, plus selected allied commands like our Dwarfy friends up there).

Getting rid of my W/H collection was an easy decision; you can read all about my frustrations with the edition change-over in my last post on the topic, but honestly WarmaHordes and I never quite gelled. It's a bit like the 4e D&D of the miniatures hobby—it does its thing very well, but pretty much every single design decision went against what I look for in my gaming experience.

And best of all, the minis are all going to My Esteemed Opponent, so I know they'll have a good home!

Selling my beloved Armies of Arcana Amazons and Undead was a harder decision, but the reasons behind purchasing them many years ago no longer even remotely apply (long story, another topic for a future post perhaps), and the money goes to a good cause. Besides, I'll still have an Amazon and Undead army, just...different.

Once I settled on this plan, my thoughts turned to how to go about collecting. My usual approach (as it is for most hobbyists) is to sit down and work up a "master list" of what I want to get, and then start putting in orders, either all at once or in stages (depending on how hard the list is going to hit the ol' pocketbook). I wanted this experience to be different.

Back in the day, my miniatures collections grew organically. I didn't have anything near the means to afford to buy even a portion of an army at once, instead collecting in dribs and drabs. This was also the days before online shopping, when I was mostly dependent on what my local game store sold. This availability forced me to build my army in ways I might not have otherwise. (I never did get that unit of halfling archers for my Empire army...)

My intention is to follow this pattern to some extent via eBay. As much as possible, I am using what's available on eBay as a guide to what units will be in my army. For example, I picked up a blister pack of two Amazon Sabertooth Cat Riders, so that means I'll have a unit of those. I can fill in the gaps with orders of recast figures from Mirliton, as well as supplemental orders from Ral Partha, Alternative Armies, and even Hasslefree (since they scale well with old-school sculpts). I also have some pre-conceived ideas of which units are "must haves" (like the Dwarven War Cannon) and which I'm going to totally avoid (I want my Undead army to be wholly infantry, for example—it just seems more "Army of Darkness"-esque that way).

Over the past two or three weeks I've been quietly purchasing figures off eBay and I just put in a big order for my first "wave" of supplementary figures from Mirliton and Alternative Armies, so I should be seeing the first proper units taking shape for my various armies soon.

At that point, I'm going to start painting. I won't be ordering any other "waves" until I have this one painted, though I'll continue to troll eBay for more seed figures for future units.

Before I go, a quick and wholly unoriginal observation. Take a look at the photo below:


I was lucky enough to find an original box of the Dwarven War Cannon still in shrink wrap for a very reasonable price. And just look at that original price tag: $8.95! That is wild.

One of the reasons I wanted this particular set so desperately is because I actually owned it back in the day. I have vivid memories of picking it up during a trip to Wargames West in Albuquerque in 1991. Even with the meager allowance I was earning as a 13 year old, clearly $8.95 was well within my means.

Plugging $8.95 in 1991 money into an inflation calculator yields a price today of $16.35. Outside of Reaper Bones, you simply could not find a model of that size and "battlefield value" for that kind of price today. It makes me wonder whether it's even possible for today's youth to get into the wargaming hobby in the same way I did.

Of course, Grenadier ended up going out of business within a few years of releasing this set, so maybe their pricing wasn't terribly realistic even for those times...

Tuesday, June 28, 2011

Armies of Arcana House Rules

As I mentioned in yesterday's battle report, my last game of Armies of Arcana brought with it my critical mass moment - the moment I realized I'd played the Rules As Written enough to form opinions on what I wanted to add or change.

The core of the system will remain untouched for the most part. The only major rule I'm fiddling with (and this has been a house rule from the outset, actually) is to make Missile Immunity somewhat less powerful. The remainder of my house rules are really additions to the system, incorporating some of my favorite elements from Fantasy Warriors: pre-battle scouting (and its effect on terrain placement and army deployment), boasts, omens, time of day and bad light, and a rational victory system (which incorporates elements from the AoA Meeting Engagement scenario as well).

I'm looking forward to giving these additions a whirl at some point in the near future. I've promised myself I won't play another game until I've finished my river tiles, so it might be a little bit, but when it does happen I'll be sure to post pictures and thoughts as always!

Til then, if you want to take a look at my house rules just click on the nekkid necromancer below:

Monday, April 20, 2009

Armies of Arcana Battle Report #1

As anticipated, the big day finally came. With my Hexon II terrain flocked and ready to go, we were finally ready, for the first time in nearly two years(!) we busted out the minis and the dice and had ourselves a game.

This was our first outing with Armies of Arcana. As our new fantasy armies aren't painted up yet, we busted out our old Fantasy Warriors armies to test the system. Surprisingly, the armies came out to approximately equal points values in AoA as well, so we were good to go.

Before I get into the battle report proper, my impressions on AoA, both in general and as it applies to Fantasy Warriors.

I have to say that AoA very much lived up to my expectations. Despite being our first game, things flowed very smoothly. We had practically no need of rules lookups, particularly after the first couple turns. One of my biggest issues with FW was the way modifiers could pile up for nearly every roll. It made for either tons of chart lookups or having to keep a bunch of running totals swimming around in our heads. AoA, for the most part, has only a handful of modifiers that come up with any sort of regularity. I also liked the tactical elements of the game, such as the different maneuvers, both out of melee and while engaged.

We'll probably port some of FW into AoA as houserules, particularly the pre-game sequence of reading the omens, making boasts, scouting, etc. Possibly the time clock and Bad Light rules as well.

On to the battle (click the thumbnails for larger pics)...


Here's the Hexon tiles set up in all their glory. I have yet to get together a proper 4x6 table set-up, so this was a roughly 3x5 arrangement. The versatility and aesthetic appeal of the Hexon tiles are exactly what I've been looking for. I couldn't be happier. Turns out I've got way more terrain tiles than I'll ever need, which will be great--a literally endless variety of possible arrangements!

A ground's-eye view of the table. You can see the undulating terrain and hills that the tiles allow you to create.

Here's a view of the armies after set-up. As per the rules, we each set the game-winning objective for the other person. I set Des the objective of defeating my general, she set my objective as defeating her unit of Human Knights (lower right of the photo).

Another view of the deployment.

View from the dwarf lines.

The battle's under way. The dwarves are holding the line as the orcs advance, screened by archers in skirmish formation. Speaking of archers, that was a key difference between AoA and FW--missile fire is much deadlier! The first half of the battle was dominated by missile duels between my orc longbows and Des's dwarven crossbows.

My plans, such as they were, revolved around a pincer-like attack. Here we can see a unit of scimitar orcs coming up on the right flank as my trolls snake their way forward, sheltering from missile fire as long as possible.

And here's the left flank; my other unit of scimitar orcs and a wolf-mounted hero wheeling around the craggy hill, making for the human knights.

The missile duels over (you can see my archers falling back behind the advancing orcs with spears and the dwarven crossbows doing likewise), melee approaches.

Flash forward a couple turns. I had taken a gamble in casting Chaos Vortex from my wizard's lofty vantage point on the hill. In true orcish fashion, the Vortex drifted across both friendly and unfriendly units, wreaking total havoc in the process. The good news is that it completely wiped out a unit of dwarven spears and seriously compromised another unit of dwarves with two-handed axes--but it also took care of fully half of my own unit of spear-orcs! Here they are fleeing from the Vortex as my wizard and general look on helplessly. My center had collapsed.

That's when I decided to take a gamble. I cast Mark of Chaos on my general, hoping to get a nice little bonus for the fight I knew was coming--my general would have to hold the center against the inevitable onslaughts (my general being the victory objective and all...).

I informed Des of the odds: on a roll of 1 thru 4, my general would get a buff. A roll of 5 would have no effect. A roll of 6 and my general blows up.

I rolled a 6. 

Although Des hadn't technically killed my general, we took that as good enough for dwarven victory purposes.

Here's where the left flank stood when the general blew up. An assault was imminent, and things definitely were still very much up in the air. But dinner was calling, and I was willing to take a risk on my general. The risk didn't pay off this time. Next time...

Well, next time I'll hopefully be busting out some sweet Undead action. Oh yes, there will be a next time.

Tuesday, May 29, 2007

Fantasy Warriors Battle Report #6

Long-time readers of this blog may recall when Desiree's brother Mark made a visit last August and trounced me using D.'s Dwarves. This Memorial Day Weekend saw Des's family coming up for her college graduation (congrats!) and a showdown between her dad Frank and myself was only natural. Would this prove a case of "like father, like son" or would I be able to lead my greenskins to victory? Read on...

Like Mark, Frank had never played a miniatures game but was quite interested in the concept and eager to give it a shot. To that end, Desiree once again put her Dwarf army on loan. I was cautiously optimistic that my tweaked Orc army, coming off a two-game winning streak, would do better than it did against Mark--whose utter defeat of my army inspired me to make the changes in the first place.

Previous games have been played on a 6' x 4' layout, but Des and I had been noticing that inevitably only about 2/3 of the table (if that) would see any use, so I decided on a 4 foot square layout for this game, which worked just fine.

Using my scouting house rules (see the previous bat-rep), my Orcs outscouted (between my wizard and mounted elements, this only makes sense...hooray for house rules that are a massive improvement over the published rules!). We agreed on a river for the board and I set up a table and selected an edge such that the Dwarf deployment had a river with no crossing on the right flank, a patch of rough ground on the left, and a hill in the center. My own deployment had some woods and a bridge on my own left and was otherwise open.

Frank, at Mark's urging, chose to roll to negate the broken ground and did so. He set up the majority of his army on the hill, with the crossbows out front, the spears behind, and the Human knights in reserve; the axe-wielding Dwarves were set up on the flanks. An excellent deployment to be sure.

I went with my standard deployment--fast units as flankers (trolls on my left, wolfriders on my right), orc infantry in the center, orcs with spears in reserve, rabble archers out front (to act as a missile screen as much as anything...). My trolls began the game concealed in the woods, which was a nice bonus for a unit that always attracts a lot of crossbow bolts from the get-go.

As always I attempted to read the omens and they came up "bad". I cast Fudge the Omens and tried again...still no luck. Oh dear. Neither of us issued any boasts. I rolled for time of day and got Night, but the time dial was set at "5"--only two turns until dawn! Dang. By the time my forces would come to grips with the stunties, it would be light. Sometimes Orcs just can't catch a break, you know?

We issued identical orders: Attack for our infantry, Oppose for our missile troops. As usual, the battle opened with relentless crossbow fire, directed entirely against my Trolls and wolfriders. Lady Luck finally began to favor me as the two units emerged through the hail of arrows unscathed. My infantry also moved out, although my spear-orcs lost 1/4 of their number trying to ford the Strength 5 river. D'oh! Chastened, they turned for the bridge...

My fast moving flankers took only a couple turns to reach the bearded lines, weathering potentially murderous crossbow fire the whole while, mainly due to my hot rolling with their saves. The wolfriders slammed into a unit of axe-dwarves, the Trolls took on the spear-dwarves in the center as the crossbows fell back.

As my own center moved up, things progressed nicely on my right as the wolfriders systematically cut through their opponents despite the assistance of the Human battle leader. Meanwhile, a massive brew-up began to form in the center on top of the hill as units from both sides were sucked into a roiling melee as soon as they arrived on the scene. All considerations of tactical finesse were thrown aside in favor of generalized slaughter.

By the time the wolfriders finished off the axes on my right the melee on the hill had evolved to include every non-missile unit from both sides with the exception of the knights. In a replay of the confrontation from my game against Mark, the wolfriders charged the armored humans and were slowly annihilated.

The attritional battle in the center eventually began to swing in the Dwarves' favor, but my Orcs, emboldened by their standards and worked up into bloodlust, fought to the last. The tide finally turned when the crossbows charged in (despite being on Oppose orders...whoops)--I finally conceded the game when I was down to all of six Orcs (including my warchief and battle leader).
Victory point calculations gave the Dwarves a "major victory"--they had won the battle, but my army was not out for the count. Sounds about right.

This one definitely could have gone either way; things looked very bad for the Dwarves almost to the very end. The massive fight on the hill was unlike anything I've seen before--Frank and I were both rolling double-handfuls of dice!

A few other considerations:
  • My War Trolls, downgraded from Elite to afford all the unit specials for my Orc infantry, truly showed their "Unpredictable" quality, gaining a +3 quality bonus the first round of combat, then a -3 the second round, resulting in a rout! That combat also saw the Dwarves hitting on a 2 or better but killing on a 5 or better and the trolls hitting on a 5+ and killing on a 2+...nice bit of symmetry there...
  • My Rabble Archers are worthless, worthless, worthless! During Bad Light they hit on a 6 (and even then they need to get within short range) and kill on a 6, and night doesn't improve things much. Combined with their paltry range, I'm not really sure they're worth the points. Then again, at only 60 points they barely cost me anything and they DO make handy missile shields...we'll see...
  • The big melee highlighted the most tiresome aspect of the rules: the Casualty Test. Going through that laundry list of modifiers every turn for every unit gets pretty time-consuming. I should work out a way to note the running modifier for each unit involved in combat.
  • I'm getting better at handling my Wizard. In addition to the "Fudge the Omens" spell, I also used "Incite Frenzy" to whip my Trolls into Bloodlust (an essential ingredient for any Orc army!) and gambled a bit with a last-minute assassination attempt on the Dwarf warlord with "Finger of Death". I had a 1-in-3 chance of overdrawing power and blowing up, but made it (barely--down to 1 Power Point!), but unfortunately the two kill rolls the spell grants failed to come up in my favor.
Before and after the game much discussion was given to the unpainted Dwarf bat riders--I think Des is finally ready to expand her army, despite the fact that that will give me more points to work with as well. Muhahahaha! We have yet to discuss what our next threshold will be, but I think adding bat riders will put her army at at least 1500. Maybe we can go whole-hog and double our points to 2500? Then we'll definitely need to go back to 6x4...

Speaking of terrain, I'm seriously considering buying a set of Kallistra Hexon tiles. My modular boards are great and all but they don't offer quite the versatility I thought they would. Plus the Hexon system stores a lot better than my big ol' tiles. I'll post pictures of the new terrain if I end up plunking down for it...

Tuesday, April 03, 2007

Fantasy Warriors Battle Report #5

It's that time once again, time to break out the minis and have a good ol' fashioned bloodbath (in plastic and metal, of course).

We were once again using our tricked out 1,250 point armies, which I'll detail after the report. I'm quite happy with the new incarnations of our armies--they tend to produce much closer games. The last game saw the Orcs win a Pyrrhic victory against the Dwarves--could I do better this time? Or would the little bearded freaks get the better of me? Read on...

Using a post over on the FU_UK Fantasy Warriors forum as a base, I had cooked up some new scouting rules for this game. The rules in the book are too restrictive, we felt, and frankly not very realistic. Too "gamey", I suppose. The rules are reproduced in full at the end of this report, but in essence they involve rolling a handful of dice and totalling 'em up. Certain elements in your army give you bonus dice, increasing your odds of a high total. Highest total outscouts, or outmaneuvers, as per the rulebook.

As it was, my wizard and wolf-riders gave me two bonus dice and I managed to outscout the Dwarves, although just barely. I set up a table fraught with obstacles in my opponent's deployment zone. A marsh on one flank, a wooded hill in the middle, and a patch of rocky ground on the other flank. A river snaked across the field of battle, crossed by two bridges. I improvised a weighted table (also reproduced below) to determine the river's strength, which came up "4".

Des decided to roll and try to get rid of the marsh and the rocky ground. Dice were rolled and the rocky ground was history. Due to modular nature of my boards, we couldn't remove the board entirely, so we agreed the rocky area would just be cosmetic and not affect movement.

I decided to check the omens--Des declined, claiming the Dwarves are above superstition--and...they came up Good!I steepled my fingers confindently and watched Des set up.

She decided to anchor her left flank against the table edge, setting most of her army on the extreme left of the board. Her Knights held the center and, on the other side of the wooded hill, her speardwarves guarded the extreme right flank.

I set up my forces accordingly, essentially splitting them into two wings. One wing, consisting of my trolls, an archer unit, and a unit of warriors would take on the speardwarves on the flank and try to turn it. The rest of my army would march up and engage the bulk of the dwarves, pinning them.

After we set up I observed that yet again it looked like we were not going to use a whole third of the table. I think in the future, at least until our armies' next growth spurt, I'll lobby for a 4'x4' setup instead of 6'x4'. Increases the choices in modular tiles, at the very least...

One other thing: we were getting a fairly late start on the game, so we agreed on an artificial end time three hours hence. As it turned out, the game ended of its own accord with 15 minutes to spare, so it all worked out in the end.

For orders, I set all my commands on Attack. It's in my archers' best interest to try and get within short range anyway. The time had come up as the first phase of day, so there was no point in trying to wait for the night. I'd just have to do my best with the Bad Light.

Des, for the first time, gave her troops the "classic" Dwarf Army order combo: Hold for infantry and Oppose for missile units. Nonetheless, she kept forgetting she couldn't move her troops throughout the battle and was feeling very frustrated by the Hold order, despite the morale bonus it provides. This, combined with her jealousy of all the units I get to field (no matter how poorly they might perform in contrast to her Elites) led me to observe at one point that maybe she'd be better suited for a more proactive army, like Barbarians. She ruefully agreed, but reaffirmed her love for her Dwarves all the same.

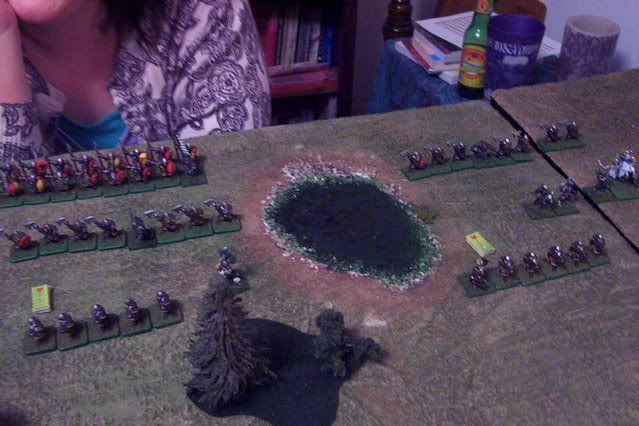
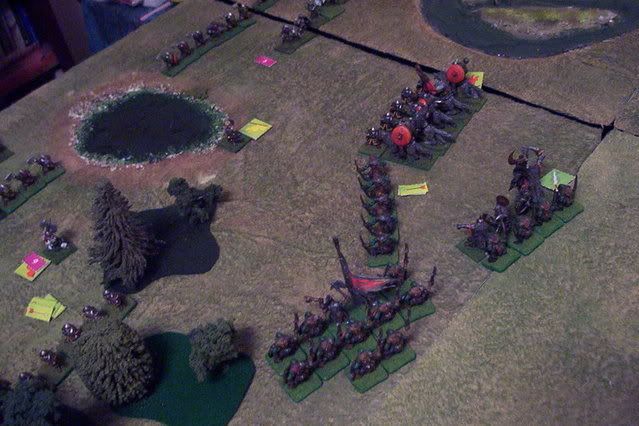
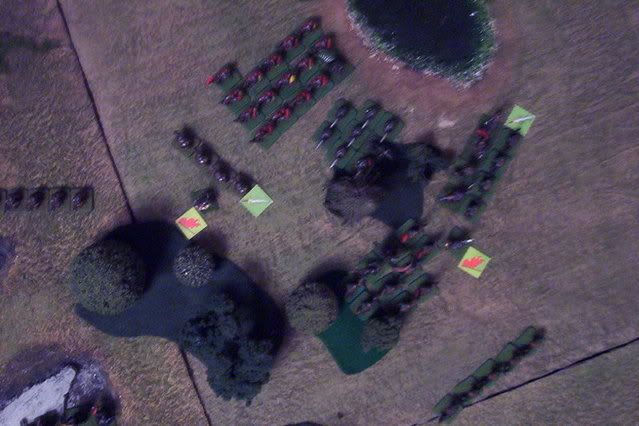
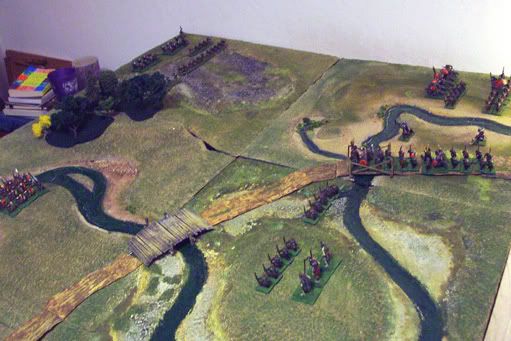
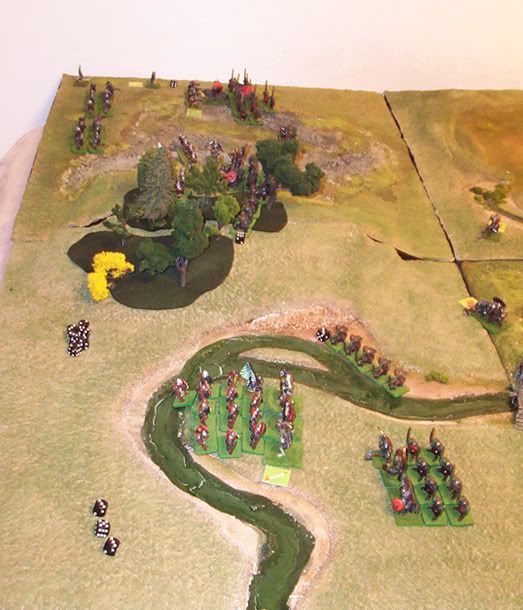
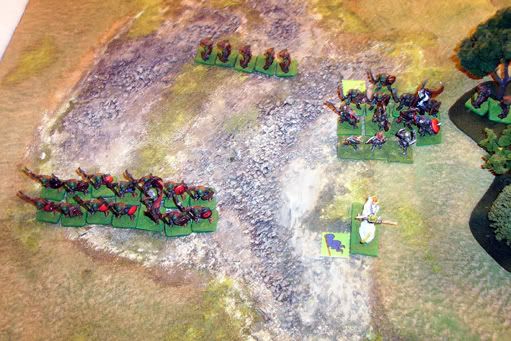
So here's the setup at the beginning of the game:

Photo Sharing and Video Hosting at Photobucket

(A note on photography: I was playing with settings throughout the evening, as the lighting in our "game room" isn't that great. After the first picture I started fiddling with exposure times, which helped, but, since I'm not a human tripod, made for some slightly blurry shots. Apologies in advance.)

My army moved out across the board. The Dwarven crossbows had been set up on the left flank, with two units out front and the third in reserve. My wolfriders fell under crossbow volleys almost immediately, but weathered the barrages intact (not for lack of potential kills--if my wolfies hadn't had their Saves, they would've been annihilated the first turn).

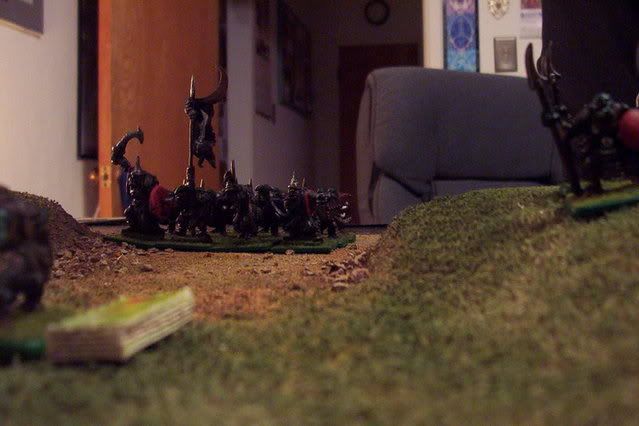
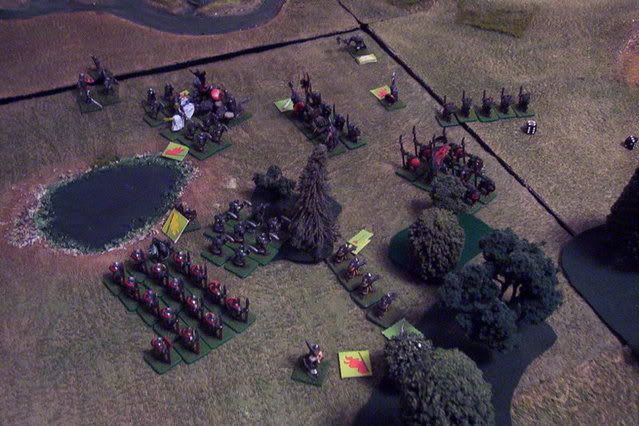
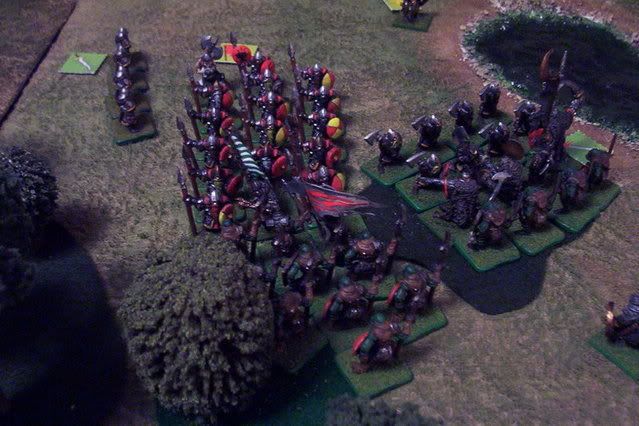
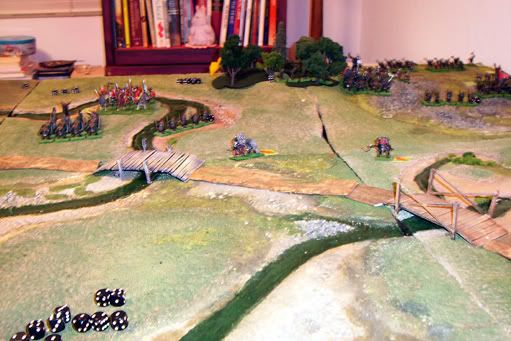
Here we see a shot from behind the Orc lines looking towards the bulk of the Dwarf army. Orcs pour across a bridge in the foreground as my Warchief and Wizard look on; meanwhile, my wolfriders crest a small rise in the background.

Photo Sharing and Video Hosting at Photobucket

The two crossbow units emptied their boltcases into my wolfriders, eventually felling two of them. As my boys drew to within charging distance, the missile units withdrew, making for the wooded hilltop, as the reserve crossbows moved up, readying their weapons. Here I paused to remove a Shaken counter my wolves had picked up, allowing the Dwarven murder machines one more round of shooting. I gritted my teeth as another wolf went down; I would have my revenge soon...

Photo Sharing and Video Hosting at Photobucket

Photo Sharing and Video Hosting at Photobucket

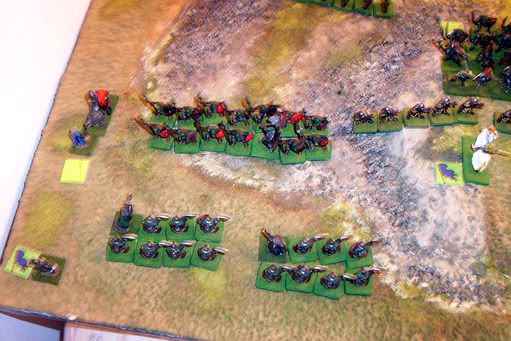
Meanwhile my trolls smashed into the speardwarves on the far right flank after some ineffectual shooting from my Rabble Archers. Dwarves started disappearing like popcorn, but they refused to budge. Clearly I was in for a fight to the finish.

Photo Sharing and Video Hosting at Photobucket

(A note about archers: I'm seriously thinking about dropping missile troops from my army. My Rabble Archers' only hope of hitting during bad light is to get within short range--six inches!--and even then they only hit on 6s. Regular archers would've been only a little better, hitting on a 5 or 6 at short range or 6 at long. Combine this with the weak power of the bow against the heavily armored stunties, and you have a recipe for a whole lotta nothin'.)

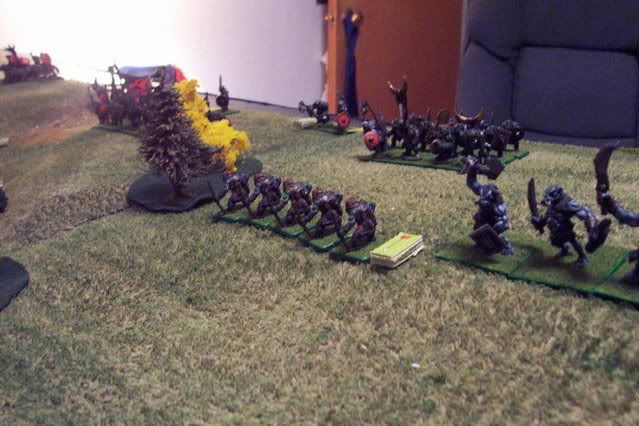
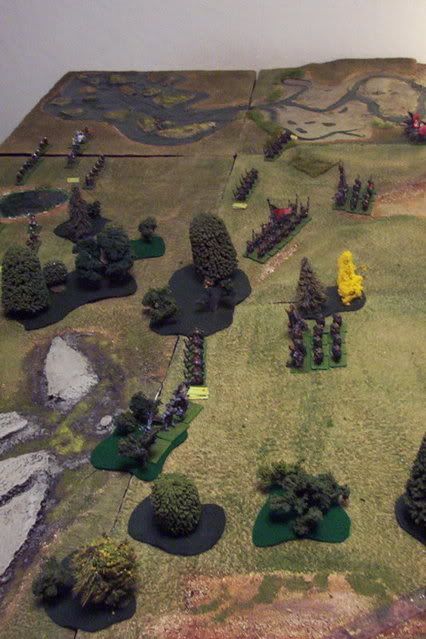
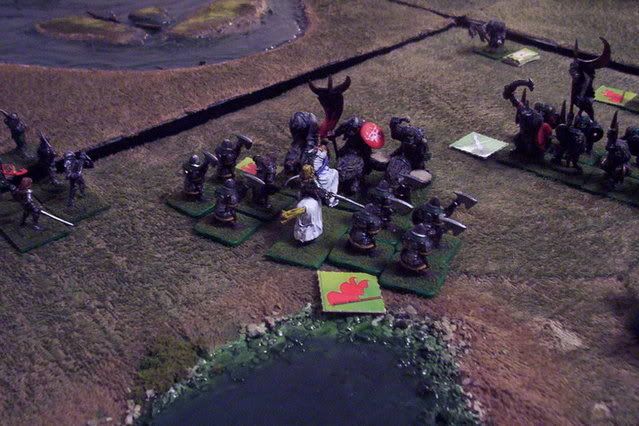
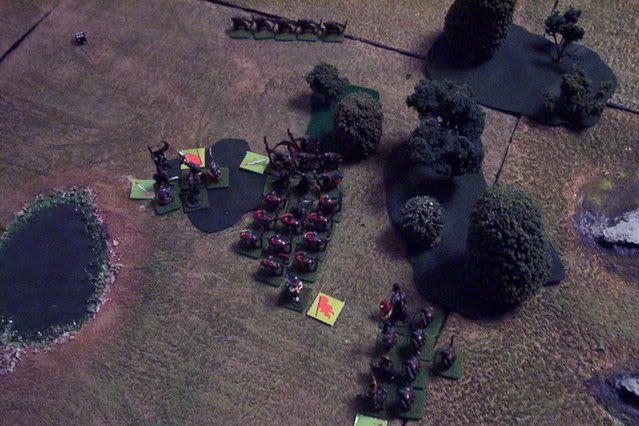
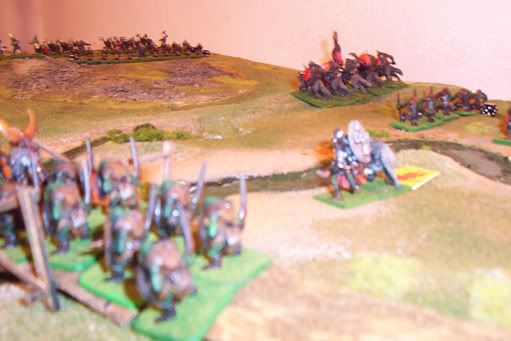
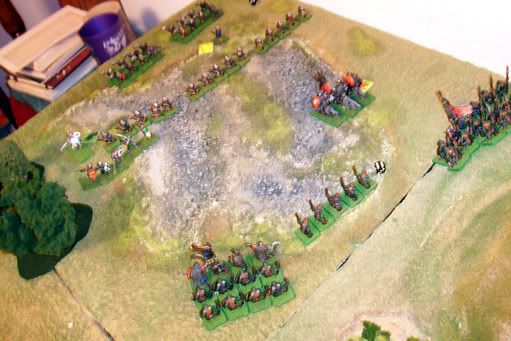
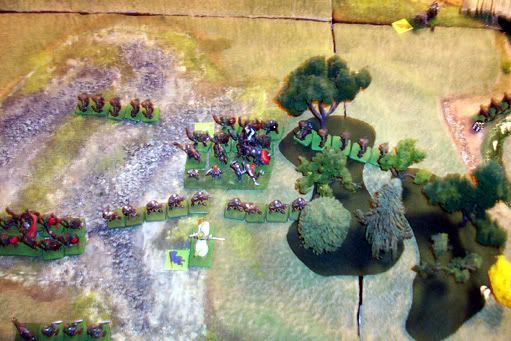
Another view of the battlefield as the Orcs begin to contact the Dwarf army:
Photo Sharing and Video Hosting at Photobucket

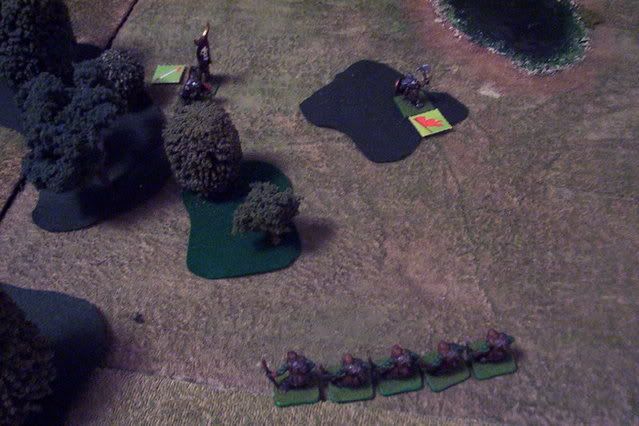
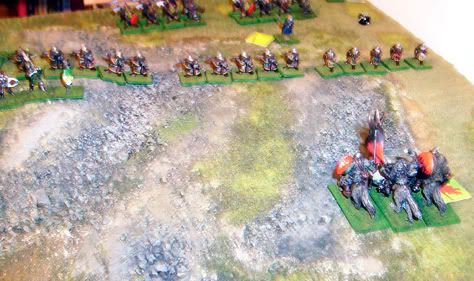
My wolfriders finally made contact with the third crossbow unit and sent it fleeing, but not before it had killed the last wolfrider, leaving only my mounted battle leader. However, an interesting opportunity presented itself as the crossbow unit routed--I had a clear path to the Dwarven warchief.

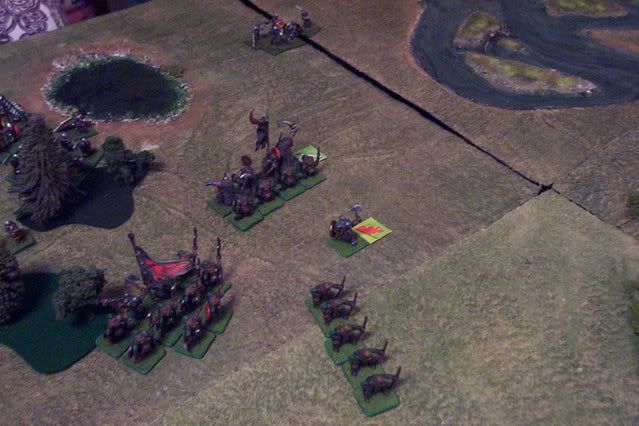
In the center, my other unit of warriors charged the knights atop the wooded hill and began dying in large numbers, gradually whittling away at the humans in the process, just like a good Orc unit should. ;)

Photo Sharing and Video Hosting at Photobucket

My mounted battle leader charged the warchief as my spear unit prepared to charge the "bearded buzzsaw", aka the dwarven axe units. The battle truly could go either way.

Photo Sharing and Video Hosting at Photobucket

As it turned out, the battle hinged on the fight between our leaders. We each inflicted two kills, and each only saved one. Both leaders died, so both armies were due for a Command Test. Of course, the Dwarves were worse off, since they'd just lost their warchief, and the dice rolls reflected this. My whole army (helped in part by the Good Omens) stuck around, although the archer command became Disorganized. The Dwarves, on the other hand, quit wholesale...

Photo Sharing and Video Hosting at Photobucket

...Well not quite. The allied Humans stood fast! Forming a desperate rearguard, drastically reduced in number, they fought on bravely. I turned my spear unit and charged it into the knights' flank. Attacked from two sides and desperately outnumbered, the brave warriors hacked left and right, splitting greenskin skulls and severing limbs with reckless abandon. The combat ended, we rolled our Combat Tests...and both Orc units routed!

I guess they figured with the battle pretty much in the bag there was no need to die needlessly fighting these crazy knights. The human allies had kept the Dwarf retreat from turning into a full-scale rout. We called the game at that point.

Victory points told the tale: I had won a "decisive" victory, but if the knights had not done what they did I could've had a "major" victory. Ah well. A win is a win. :)

Now for some details on our armies as they currently stand.

My army consists of three commands. I have one warchief, a battle leader, and a mounted battle leader (not pictured), plus a wizard:

Photo Sharing and Video Hosting at Photobucket

(The leaders are Ral Partha; the warchief has an awesome shield slung across his back with several severed hands nailed to the front. The wizard is Grenadier.)

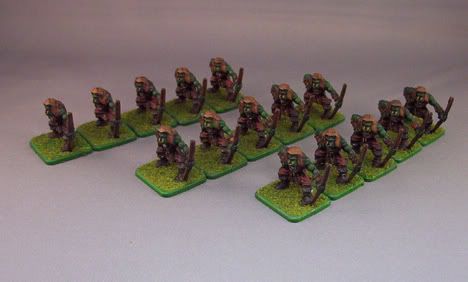
The warchief commands the Rabble Archers (although maybe not for long...):

Photo Sharing and Video Hosting at Photobucket

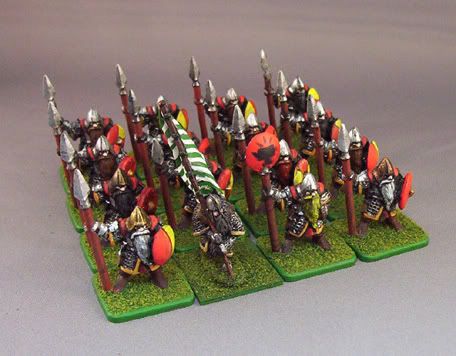
The battle leader commands a unit of orcs with spears and two units of orc warriors, plus a unit of trolls. The warriors are reinforced with a full complement of specials: standard, musician, champion, and leader. The spears, who are upgraded to Veteran, currently have only a standard (a Black Tree Miniatures "half-orc"):

Photo Sharing and Video Hosting at Photobucket

Photo Sharing and Video Hosting at Photobucket

Photo Sharing and Video Hosting at Photobucket

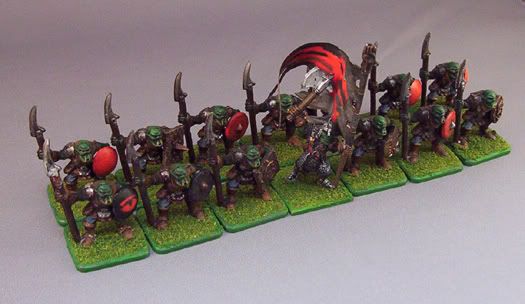
A note on the shields. For the longest time my plastics lacked shields, having failed to glue them on back in the day. Thanks to em4 Miniatures, I was able to order some replacement shields, so both armies got kitted out properly. I sprinkled in a few GW "Goblin" shields among my orc warriors to add a slight tribal feel as well.

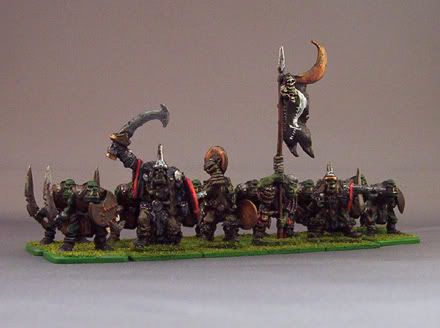
I was using Reaper Bull Orcs for my Trolls, but since the last battle I decided I wanted a more "traditional" Troll unit. Ral Partha came through, and I'm very pleased with the results--more sinewy musculature looks much more trollish, I think:

Photo Sharing and Video Hosting at Photobucket

The mounted battle leader personally commands a unit of four wolfriders that includes a standard and musician. Very much my army's "centerpiece" unit:

Photo Sharing and Video Hosting at Photobucket

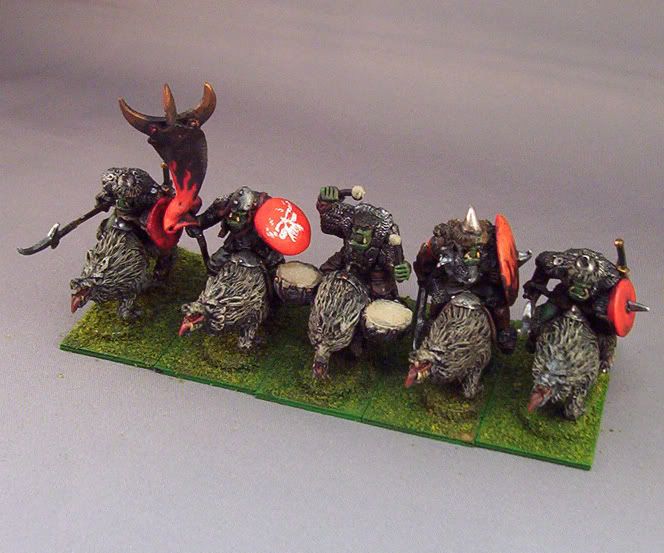
And yes, that's a hand-painted Samhain logo on the standard bearer's shield. Orcs are totally metal, didn't you know?

Speaking of paint jobs, longtime readers of this blog will recall that all my plastics were originally painted by me when I was a wee lad; I came back and added a wash and some highlights, but kept the basic color schemes. As a sort of tribute to this, I've kept all later paintjobs very simple, along with the basing, which is just simple flocking. The Samhain logo was a bit of my current painting stylings creeping in, but on the whole I think I've done a good job keeping things "back to basics".

The Dwarf army is about half the size of my Orcs, partly owing to the fact that every unit has been upgraded to Elite!

A dwarf warchief and battle leader share command responsibilities with a human allied leader:

Photo Sharing and Video Hosting at Photobucket

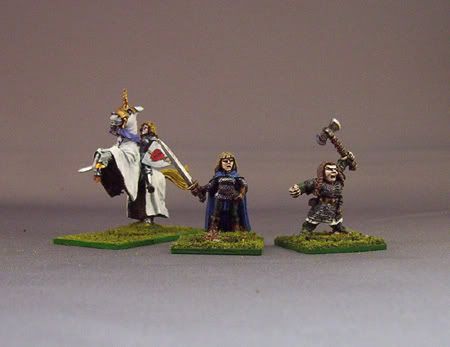
(All three figures are Ral Partha. Des wanted a matriarchal command structure!)

The warchief, like mine, commands the missile units, which, unlike mine, are deadly effective:

Photo Sharing and Video Hosting at Photobucket

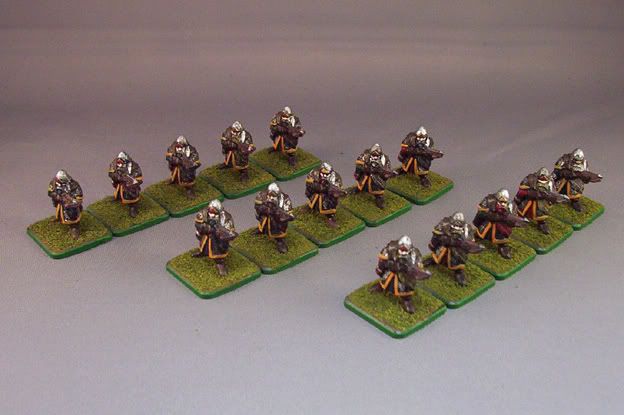
The battle leader commands the infantry, a unit of speardwarves and two units of dwarves with double-handed axes:

Photo Sharing and Video Hosting at Photobucket

Photo Sharing and Video Hosting at Photobucket

Photo Sharing and Video Hosting at Photobucket

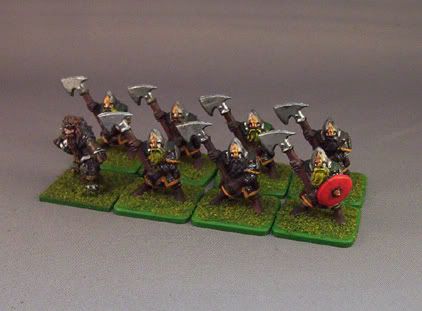
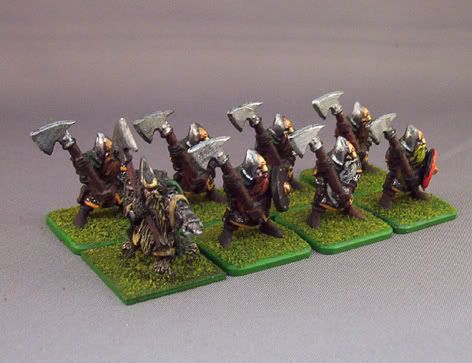
Right now the dwarf infantry can't afford too many specials. The speardwarves have a standard (who I actually painted for one of the axe units, thus the weird contrast in color scheme) and the axe units each have a leader.

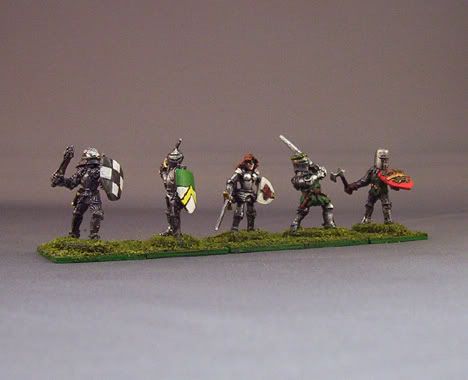
The human allies consist of a mere five foot knights, but man do they pack a wallop!

Photo Sharing and Video Hosting at Photobucket

So that's how our armies look right now. Things are always subject to change, of course, but, like I said, the current configuration lends itself to pretty exciting battles.

Til next time!

***

Scouting:

Change:
Before the battle roll:
  • 1D for each command in your army (not counting mercenaries)
  • 2D for each Scout in your army
  • 1D for each Wizard in your army
  • 2D for each flying unit
  • 1D for each mounted unit
And add your Warchief's Leadership.
The side with the greater score has outscouted the enemy. If one side has a scouting score greater than twice that of the enemy, they have outmaneuvered them.
If the totals are tied, add the following modifiers:
  • +2 per Light Armored cavalry unit
  • +1 per Medium Armored cavalry unit
  • +1 per Light Armored infantry unit
***
Random River Strength Table
As any river with a mid- to high-level strength is nearly impossible to cross in FW, this table weights results towards the lower end of the scale.

Roll 1D:
1: Strength 1
2-3: Strength 2
4-5: Strength 3
6: Roll again...

Roll 1D:
1: Strength 4
2: Strength 5
3: Strength 6
4: Strength 7
5-6: Roll again...

Roll 1D
1-2: Strength 8
3-4: Strength 9
5-6: Strength 10

Sunday, January 21, 2007

Fantasy Warriors Battle Report

Once again, it's Dwarves vs. Orcs, this time with our tweaked 1,250 point armies. After my ignominous defeat the last time out, I decided my greenskins needed some moral support in the form of standards and leaders. The upgrade made for a much more satisfying, albeit bloody, game.

We used the "official" scouting rules and, as Des opted not to scout, terrain layout was entirely up to me.

(Incidentally, from here on out we'll be using a house rule for scouting that's much more satisfying and less convoluted.)

I set up a veritable wilderness on the Dwarf side, with a marsh on one side and rocky, broken ground on the other, with a fair-sized wood in the middle. I decided that this was a surprise river crossing by the Orcs, my very own "crossing of the Delaware", and set up the "big river/shoreline" tiles on my side.

Desiree deployed her troops in the center, with three layers of defense consisting of crossbows, then a unit of axes and her human knight allies, then the other axe unit and her spearmen (speardwarfs?).

Photobucket - Video and Image Hosting

I went with my standard "double envelopment" setup, which might have been ill-suited to the rough terrain of the board in retrospect. Wolves and trolls on the flanks as fast movers, rabble archers out in front to act as a skirmish screen, and a strong center of sword- and spear-armed orcs.

Photobucket - Video and Image Hosting

My left flank, with the trolls ready to mess things up.

Photobucket - Video and Image Hosting

One of the swank new units, sporting their new standard, musician, leader and champion, complete with atmospheric back-lighting. ;)

Photobucket - Video and Image Hosting

My wolves started on Hold thanks to their scouting (this is something we're doing away with with the new house rules--why would the scouting unit start off immobile and away from the action?), but that was quickly solved with an Eldritch Command from my wizard/warchief OTP. The rest of my army moved out as the Dwarf crossbows (aka the Murder Machines) opened up.

Photobucket - Video and Image Hosting

In the picture above you'll notice my trolls moving through the woods. That's as far as they'd get, as they were cut down in most cowardly fashion by volley after volley of crossbow bolts. Actually, if the trolls act as crossbow magnets, that's OK--less death for my other units! (Kinda like how tanks work in WWII games, or the Volley Gun in my old Warhammer army.)

Meanwhile, my wolfriders launced an attack on the Dwarven flank, cutting down a unit of crossbows as my spears and one unit of my swords moved up into the center. Meanwhile, the other unit of swords moved around the flank, stepping over the troll corpses...

Photobucket - Video and Image Hosting

After mowing down the crossbows, the wolves charged on, catching the Human battle leader as she was making her way back to her troops after picking up new orders from the warchief.

Photobucket - Video and Image Hosting

Desiree threw a unit of axes into the battle to bolster her battle leader. The first bloody melee of the game ended with my wolfriders getting wiped out and the Dwarf axes (and Human battle leader) routing off the board.

Photobucket - Video and Image Hosting

On the next turn, the Human knights quit the field. The right flank of the field had completely disintegrated! Sensing an opportunity, I moved my wizard up. Chanting and waving his arms, he opened a portal to another dimesion, summoning forth a demonic abomination...

Photobucket - Video and Image Hosting

...who promptly ate the wizard and disappeared to his home dimension.

Photobucket - Video and Image Hosting

The fight was shaping up in the center. Both sides had expended their missile units and the infantry was moving in. This was turning into our own version of the Battle of the Wilderness. (Incidentally, this battle featured the premiere of my latest attempt at finding a compromise between woods that look good on the table and still let you play. Using pieces of felt to represent the boundaries of the woods, the trees are secured to the board with pins, making them removable if a unit goes through the woods. Since one of the pivotal battles took place in the middle of one of the woods this was the perfect opportunity to test out the system and it worked really well.)

Photobucket - Video and Image Hosting

The two sides clashed just as the sun began to rise. I realized I should've started the battle just before sundown--Bad Light doesn't effect maneuvering of units, but it DOES effect combat! On my left flank, Desiree desperately threw her crossbow units against my flanking unit. My Orcs cut through them, but were hung up for a couple turns.

Photobucket - Video and Image Hosting

The battle in the center was bloody indeed. My spears hung on nearly to the last Orc (those standards really make a difference--although I was also rolling well). Meanwhile, my swords, fueled by Bloodlust, fought in the woods to the last Orc, barely defeating the Dwarf axes (in the end I had to throw in my battle leader to provide the final "push").

As the Orc spears routed off the field, the Dwarf spears turned to face my flanking foce, which had finally cut down the last Dwarven crossbows.

Photobucket - Video and Image Hosting

The exhausted speardwarves didn't last long, and I soon stood in triumph--but at what cost? I had precisely eight miniatures on the table in the end. A Pyrrhic victory, but a victory nonetheless.

Photobucket - Video and Image Hosting

Lessons learned:

1) Orcs really benefit from standards and leaders.
2) Getting my boys into Bloodlust is most desirable. It happened "by accident" this time (once from a casualty test after taking missile fire, another time when the Dwarves counter-threatened one of my threatening units), but in the future I'll make use of magic and influence to try and whip my boys into a frenzy if the opposition doesn't do it for me.

I'm looking forward to our next battle, since I'm anxious to see if this victory was just a fluke. Plus the house rules I've assembled promise to add some extra levels of sophistication to the game. Until next time!
Related Posts Plugin for WordPress, Blogger...